A Comprehensive Guide to Deploy/Dockerize a CRUD Application with React and Node.js
Introduction
In the world of web development, building a CRUD (Create, Read, Update, Delete) application is a common task. These applications serve as the backbone for various web services, providing essential functionalities for managing data. In this article, we will explore the process of deploying a CRUD application built with React and Node.js. We will take a step-by-step approach to ensure a seamless deployment process.
Before we dive into the details, let’s briefly define React and Node.js for those who might be new to these technologies.
Understanding React and Node.js
React: React is a popular JavaScript library for building user interfaces. It allows developers to create dynamic, interactive web applications by breaking them into reusable components. React applications are typically single-page applications (SPAs) that provide a smooth user experience.
Node.js: Node.js is a JavaScript runtime environment that allows developers to run JavaScript code on the server side. It is commonly used to build backend services for web applications. Node.js’s non-blocking, event-driven architecture makes it an excellent choice for building scalable server applications.
I have successfully deployed this CRUD application using this repository Saurabh-DevOpsVoyager77/simple-crud-app-react-nodejs(github.com), where you can access the entire codebase and expedite the deployment process. However, I recommend that you familiarize yourself with the following steps to gain a comprehensive understanding of the deployment procedure.
Prerequisites:
Before you begin, make sure you have the following prerequisites installed on your system:
Docker: This project utilizes Docker for containerization. You can install it from the official website.
Docker-Compose: Make sure you have Docker Compose installed.
Git: To clone the project, you need Git installed on your system.
Nginx: This project assumes that Nginx is installed and configured on your system.
A. Clone the repository
git clone https://github.com/arturguitelar/simple-crud-react-nodejsCreate the directory in the cloned repository and configuration for nginx:
mkdir -p docker/nginx/conf.d
cd docker/nginx/conf.d
vim default.conf
server {
    listen 80;
    server_name localhost;

    location / {
        proxy_pass http://frontend:80;
        proxy_set_header Host $host;
        proxy_set_header X-Real-IP $remote_addr;
        proxy_set_header X-Forwarded-For $proxy_add_x_forwarded_for;
    }

    location /api/ {
proxy_pass http://backend:3333;
  }
}
B. Start nginx service
sudo systemctl start nginx.service
sudo systemctl enable nginx.service
C. Create the Multistage Docker file
- Create the Multistage Docker file in the Frontend directory:
# Stage 1: Build Node.js app
FROM node:12.2.0-alpine AS build
WORKDIR /app
COPY . .
COPY src .
COPY package.json .
RUN npm install
RUN npm run build

# Stage 2: Serve app with Nginx
FROM nginx:alpine
COPY --from=build /app/build /usr/share/nginx/html
EXPOSE 80
CMD ["nginx", "-g", "daemon off;"]
- Create the Docker file in the Backend directory:
FROM node:12.2.0-alpine
WORKDIR /app
COPY package*.json ./
RUN npm install
COPY . .
EXPOSE 3333
CMD ["npm", "start"]
- Create a Docker-compose file in the main directory:
version: '3'
services:
  frontend:
    build:
     context: ./frontend
     dockerfile: Dockerfile
    depends_on:
      - backend
  backend:
    build:
     context: ./backend
     dockerfile: Dockerfile
    ports:
      - "3333:3333"
  proxy:
    image: nginx
    ports:
      - "8080:80"
    volumes:
      - ./docker/nginx/conf.d:/etc/nginx/conf.d
    depends_on:
      - frontend
D. Start the Application
Run the following command to start the application:
docker-compose up --build
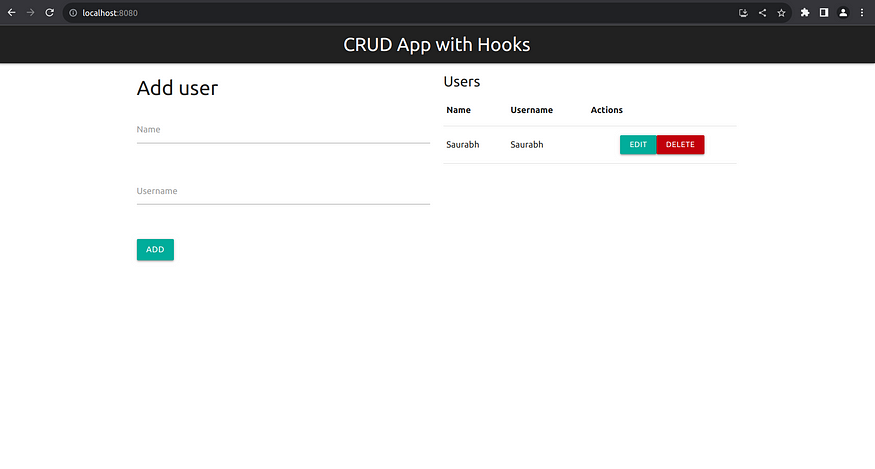
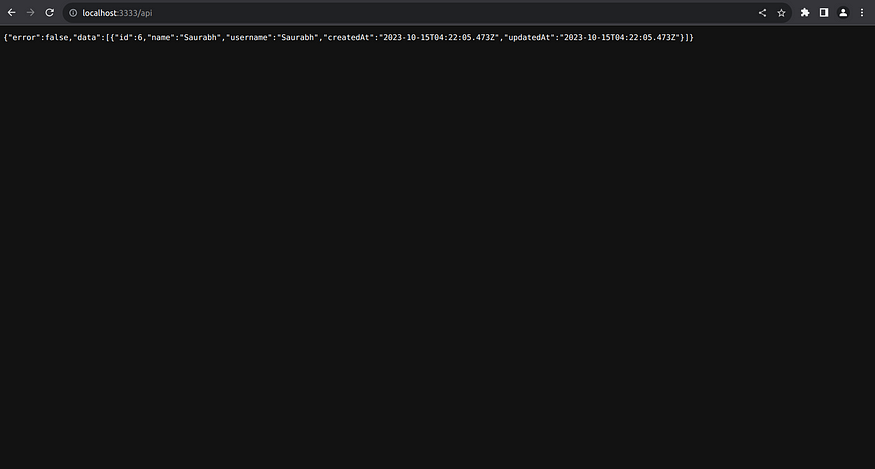
This will set up the application, and you can access it via your web browser frontend at http://localhost:8080 and backend at http://localhost:3333/api
Application Details
This CRUD application is designed to showcase how to create, retrieve, update, and delete items from a data source using React and Node.js. You can use this project as a starting point for building your own CRUD applications or as a learning resource to understand the integration of React and Node.js.
After navigating to http://localhost:8080, you will be presented with the frontend interface, exemplified in the image below. This interface serves as the user-friendly portal to interact with the application, enabling you to create, read, update, and delete data entries seamlessly.

For direct access to the backend and its data, navigate to http://localhost:3333/api. Here, you can interact with the backend services and examine the data, as depicted in the image below. The backend is the backbone of the application, responsible for processing data requests and serving as the intermediary between the user interface and the data source.

These two distinct components, the frontend and the backend, collaboratively deliver a robust and user-centric experience for managing data within the application.
Conclusion
We have walked through the process of deploying and containerizing a Node.js application, marking a significant milestone in bringing your CRUD application to a production environment. By following the steps outlined in this guide, you have learned how to ensure the scalability, flexibility, and security of your application. The deployment process is a critical phase in a web developer’s journey, and mastering it is essential for delivering a seamless user experience. As you continue your development endeavors, remember that the world of web development is ever-evolving, so staying updated with best practices and new tools is key to success. Happy deploying!”
Feel free to explore, experiment, and customize it to your heart’s content!
If you found this guide to be a valuable resource, don’t hesitate to give it a round of applause by clicking on the 👏 button. Your feedback is greatly appreciated, so feel free to share your thoughts in the comments section.
Stay tuned for more engaging stories like this and thank you for your support! 😊📚