

Scheduling
Kubernetes users normally don’t need to choose a node to which their Pods should be scheduled.
Instead, the selection of the appropriate node(s) is automatically handled by the Kubernetes scheduler.
Automatic node selection prevents users from selecting unhealthy nodes or nodes with a shortage of resources.
However, sometimes manual scheduling is needed to ensure that certain pods only scheduled on nodes with specialized hardware like SSD storages, or to co-locate services that communicate frequently(availability zones), or to dedicate a set of nodes to a particular set of users.
Kubernetes offers several ways to manual schedule the pods. In all the cases, the recommended approach is to use label selectors to make the selection.
Manual scheduling options include:
nodeName
nodeSelector
Node affinity
Taints and Tolerations
nodeName
nodeName is a field of PodSpec.
nodeName is the simplest form of node selection constraint, but due to its limitations it is typically not used.
When scheduler finds no nodeName property, it automatically adds this and assigns the pod to any available node.
Manually assign a pod to a node by writing the nodeName property with the desired node name.
We can also schedule pods on Master by this method.
Some of the limitations of using nodeName to select nodes are:
▪ If the named node does not exist, the pod will not be run, and in some cases may be automatically deleted.
▪ If the named node does not have the resources to accommodate the pod, the pod will fail and its reason will indicate why, for example OutOfmemory or OutOfcpu.
▪ Node names in cloud environments are not always predictable or stable
Prepare to take the reins as we journey into the world of Kubernetes manual scheduling with a real-world example and a single, game-changing command
create “nodeName.yml”:
apiVersion: v1
kind: Pod
metadata:
  name: nginx
spec:
  containers:
  - name: nginx
    image: nginx
    ports:
    - containerPort: 80
  nodeName: k8s-master
Run this command:
kubectl apply –f nodeName.yml
nodeSelector
nodeSelector is a field of PodSpec.
It is the simplest recommended form of node selection constraint.
It uses labels(key-value pairs) to select matching nodes onto which pods can be scheduled.
Disadvantage with nodeSelector is it uses hard preferences i.e., if matching nodes are not available pods remain in pending state!
check default node labels:
kubectl describe node <node_name>
Add labels to nodes:
kubectl label nodes <node-name> <label-key>=<label-value>
kubectl label nodes k8s-slave01 environment=dev
Create a “nodeSelector.yml”:
apiVersion: v1
kind: Pod
metadata:
  name: nginx
  labels:
    env: test
spec:
  containers:
  - name: nginx
    image: nginx
  nodeSelector:
    environment: dev
Run this command:
kubectl apply –f nodeSelector.yml  #To create pod
kubectl get pods –o wide --show -labels #To get all pods with labels
kubectl describe pod <pod-name> #To describe the pod/to get more details about the pod
nodeAffinity
Node affinity is specified as field nodeAffinity in PodSpec.
Node affinity is conceptually similar to nodeSelector — it allows you to manually schedule pods based on labels on the node. But it has few key enhancements:
nodeAffinity implementation is more expressive. The language offers more matching rules besides exact matches created with a logical AND operation in nodeSelector.
Rules are soft preferences rather than hard requirements, so if the scheduler can’t find a node with matching labels, the pod will still be scheduled on other nodes There are currently two types of node affinity rules:
requiredDuringSchedulingIgnoredDuringExecution: Hard requirement like nodeSelector. No matching node label, no pod scheduling!
preferredDuringSchedulingIgnoredDuringExecution: Soft requirement. No matching node label, pod gets scheduled on other nodes!
The IgnoredDuringExecution part indicates that if labels on a node change at runtime such that the affinity rules on a pod are no longer met, the pod will still continue to run on the node.
Create a “nodeAffinity.yml”:
apiVersion: v1
kind: Pod
metadata:
  name: with-node-affinity
spec:
  affinity:
    nodeAffinity:
      requiredDuringSchedulingIgnoredDuringExecution:
        nodeSelectorTerms:
        - matchExpressions:
          - key: environment
            operator: In
            values:
            - prod
  containers:
  - name: nginx-container
    image: nginx
Run this command:
kubectl apply –f nodeAffinity.yml
Pod gets scheduled on the node has the label environment=production.
If none of the nodes has this label, pod remains in pending state.
To avoid this, use affinity “preferredDuringSchedulingIgnoredDuringExecution”
Taints and Tolerations
Node affinity is a property of Pods that attracts them to a set of nodes (either as a preference or a hard requirement).
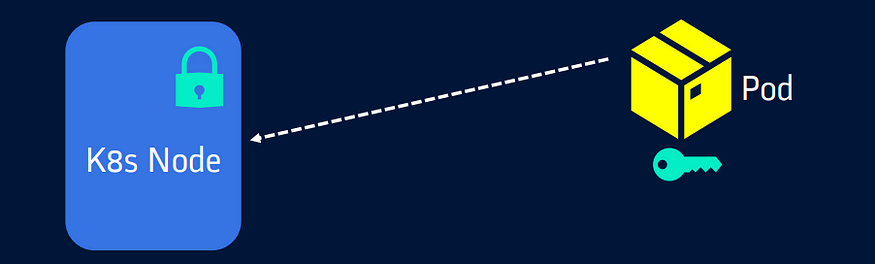
Taints are the opposite — they allow a node to repel a set of pods.
Taints are applied to nodes(lock).
Tolerations are applied to pods(keys).
In short, pod should tolerate node’s taint in order to run in it. It’s like having a correct key with pod to unlock the node to enter it.
Taints and tolerations work together to ensure that pods are not scheduled onto inappropriate nodes.
- By default, Master node is tainted. So you cannot deploy any pods on Master .
To check taints applied on any node use kubectl describe node <node_name>
Apply taint to nodes:
kubectl taint nodes <node-name> key=value:<taint-effect>
taint’s key and value can be any arbitrary string.
taint effect should be one of the supported taint effects such as
NoSchedule: no pod will be able to schedule onto node unless it has a matching toleration.
PreferNoSchedule: soft version of NoSchedule. The system will try to avoid placing a pod that does not tolerate the taint on the node, but it is not required.
NoExecute: node controller will immediately evict all Pods without the matching toleration from the node, and new pods will not be scheduled onto the node
Apply taint to nodes:
kubectl taint nodes k8s-slave01 env=stag:NoSchedule
In the above case, node k8s-slave01 is tained with label env=stag and taint effect as NoSchedule. Only pods that matches this taint will be scheduled onto this node
Create “taint_toleration.yml”
apiVersion: apps/v1
kind: Deployment
metadata:
  name: nginx-deployment
spec:
  replicas: 3
  selector:
    matchLabels:
      app: myapp
  template:
    metadata:
      name: myapp-pod
      labels:
        app: myapp
    spec:
      containers:
      - name: nginx-container
        image: nginx
      tolerations:
      - key: "env"
        operator: "Equal"
        value: "stag"
        effect: "NoSchedule"
Run this command:
kubectl apply –f taint_toleration.yml
Here pods are scheduled onto both the slave nodes.
Only slave01 is tainted here and matching tolerations are added to pods. So pods are scheduled onto slave-01 as well.
If we remove the tolerations from the pods and deploy them, they will get scheduled onto slave-02 only as slave01 is tainted and matching toleration is removed/not available with pods!
Congratulations, you’ve now mastered the art of manual scheduling in Kubernetes! 🚀 With nodeName, nodeSelector, nodeAffinity, and taint toleration at your command, you’ve unlocked a new level of control over your containerized applications.
🛠️ Keep up the great work, and remember that Kubernetes offers a world of possibilities for those who dare to explore. 🌟 It’s as if you’ve gained the keys to the kingdom, and your container orchestration journey has just begun. 🗝️ Happy orchestrating! 🎉