Kubernetes Unleashed: Exploring the Core Architecture and the Magic of PODS for Beginners!!


Kubernetes (K8s)
Kubernetes also known as K8s, is an open-source Container Management tool.
It provides container runtime, container orchestration, container-centric infrastructure orchestration, self-healing mechanisms, service discovery, load balancing and container (de)scaling.
Initially developed by Google, for managing containerized applications in a clustered environment but later donated to CNCF.
Written in Golang
It is a platform designed to completely manage the life cycle of containerized applications and services using methods that provide predictability, scalability, and high availability.
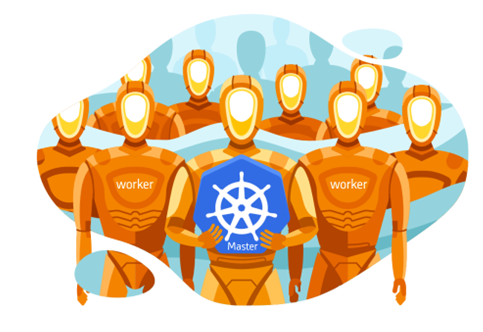
A Kubernetes cluster is a set of physical or virtual machines and other infrastructure resources that are needed to run your containerized applications. Each machine in a Kubernetes cluster is called a node. There are two types of nodes in each Kubernetes cluster:
Master node(s): hosts the Kubernetes control plane components and manages the cluster.
Worker node(s): runs your containerized applications.
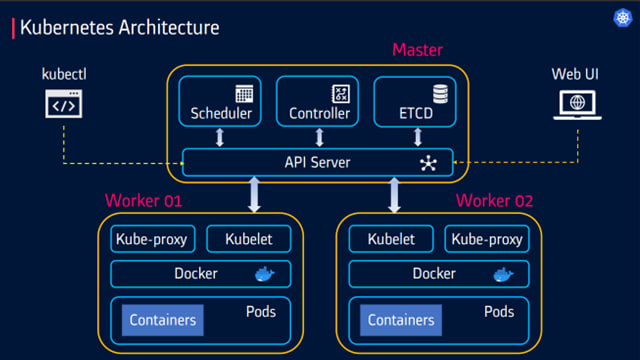
Kubernetes Architecture
Kubernetes Master
Master is responsible for managing the complete cluster.
You can access master node via the CLI, GUI, or API
The master watches over the nodes in the cluster and is responsible for the actual orchestration of containers on the worker nodes
For achieving fault tolerance, there can be more than one master node in the cluster.
It is the access point from which administrators and other users interact with the cluster to manage the scheduling and deployment of containers.
It has four components: ETCD, Scheduler, Controller and API Server
ETCD
ETCD is a distributed reliable key-value store used by Kubernetes to store all data used to manage the cluster.
When you have multiple nodes and multiple masters in your cluster, etcd stores all that information on all the nodes in the cluster in a distributed manner.
ETCD is responsible for implementing locks within the cluster to ensure there are no conflicts between the Masters
Scheduler
The scheduler is responsible for distributing work or containers across multiple nodes.
It looks for newly created containers and assigns them to Nodes.
API server manager
Masters communicate with the rest of the cluster through the API-server, the main access point to the control plane.
It validates and executes user’s REST commands
API-server also makes sure that configurations in etcd match with configurations of containers deployed in the cluster.
Controller manager
The controllers are the brain behind orchestration.
They are responsible for noticing and responding when nodes, containers or endpoints go down. The controllers make decisions to bring up new containers in such cases.
The controller-manager runs control loops that manage the state of the cluster by checking if the required deployments, replicas, and nodes are running in the cluster.
Kubernetes Worker
Kubelet
Worker nodes have the kubelet agent that is responsible for interacting with the master to provide health information about the worker node.
To carry out actions requested by the master on the worker nodes.
Kube proxy
- The kube-proxy is responsible for ensuring network traffic is routed properly to internal and external services as required and is based on the rules defined by network policies in kube-controller-manager and other custom controllers.
Unlocking the Power of Kubernetes: Dive into the World of Pods!!
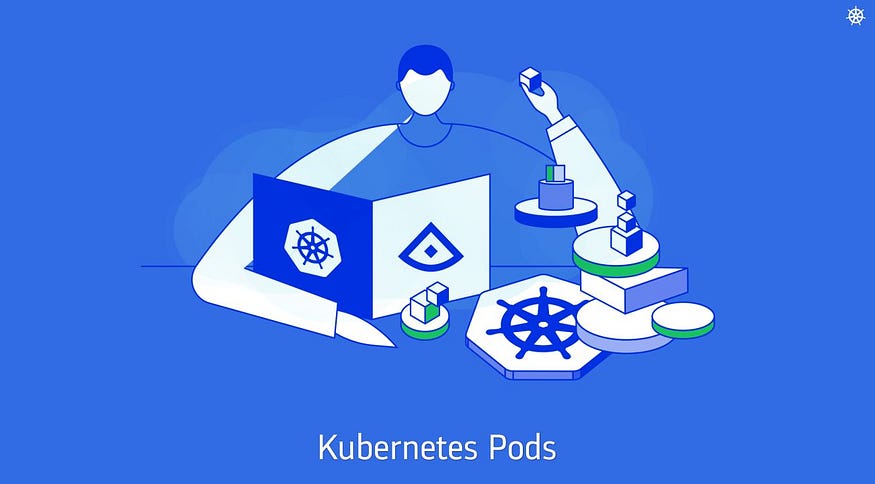
Basic scheduling unit in Kubernetes. Pods are often ephemeral.
Kubernetes doesn’t run containers directly; instead, it wraps one or more containers into a higher-level structure called a pod
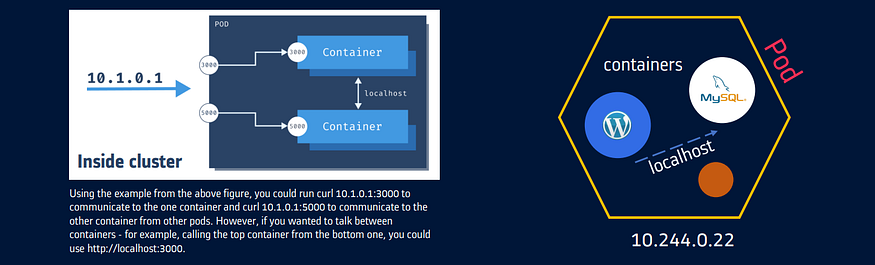
It is also the smallest deployable unit that can be created, scheduled, and managed on a Kubernetes cluster. Each pod is assigned a unique IP address within the cluster.
Pods can hold multiple containers as well, but you should limit yourself when possible. Because pods are scaled up and down as a unit, all containers in a pod must scale together, regardless of their individual needs. This leads to wasted resources.
Any containers in the same pod will share the same storage volumes and network resources and communicate using localhost
K8s uses YAML to describe the desired state of the containers in a pod. This is also called a Pod Spec. These objects are passed to the kubelet through the API server.
Pods are used as the unit of replication in Kubernetes. If your application becomes too popular and a single pod instance can’t carry the load, Kubernetes can be configured to deploy new replicas of your pod to the cluster as necessary.
Scaling Pods
All containers within the pod get scaled together.
You cannot scale individual containers within the pods. The pod is the unit of scale in K8s.
Recommended way is to have only one container per pod. Multi container pods are very rare.
In K8s, initcontainer is sometimes used as a second container inside pod.
Imperative vs Declarative commands
Kubernetes API defines a lot of objects/resources, such as namespaces, pods, deployments, services, secrets, config maps etc.
There are two basic ways to deploy objects in Kubernetes: Imperatively and Declaratively
Imperatively
Involves using any of the verb-based commands like kubectl run, kubectl create, kubectl expose, kubectl delete, kubectl scale and kubectl edit.
Suitable for testing and interactive experimentation.
Declaratively
Objects are written in YAML files and deployed using kubectl create or kubectl apply.
Best suited for production environments.
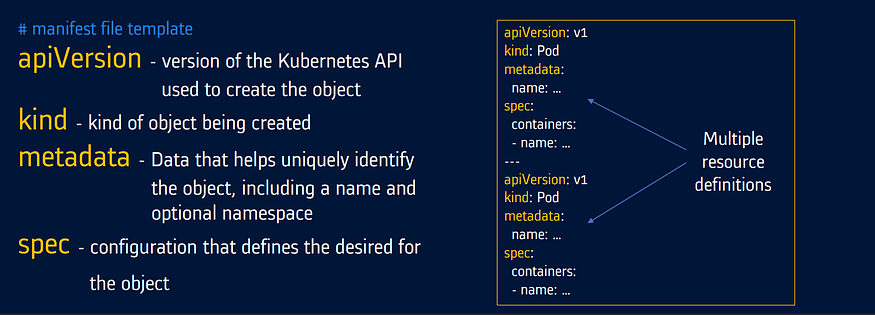
Manifest /Spec file
K8s object configuration files — Written in YAML or JSON
They describe the desired state of your application in terms of Kubernetes API objects. A file can include one or more API object descriptions (manifests).
Creating Pods
Imperative way:
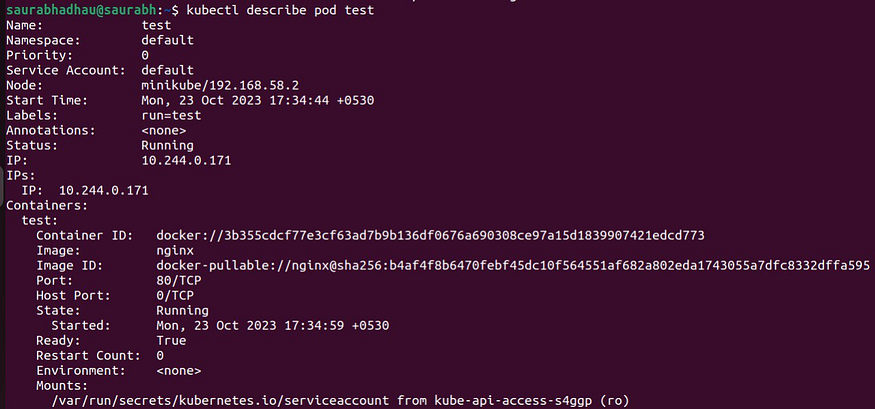
kubectl run test --image nginx --port 80 #Also exposes port 80 of container
Then run this command to see the details of your pod
kubectl describe pod test
Declarative way:
Create YAML file with any name and paste this code in it:
apiVersion: v1
kind: Pod
metadata:
  name: nginx-pod
  labels:
    app: webapp
spec:
  containers:
  - name: nginx-container
    image: nginx
    ports:
    - containerPort: 80
Now Run this command with your exact file name:
kubectl create –f <file_name>.yml #To create new pod
kubectl apply –f <file_name>.yml #If the manifest file is changed/updated after deployment and need to re-deploy the pod again
kubectl delete pod <pod-name> #To delete the pod
In the ever-evolving world of Kubernetes, your learning journey has just begun! 🚀 Keep exploring, keep sharing, and stay on the cutting edge of this dynamic technology. Until next time, may your pods be ever scalable and your clusters always resilient! 🌟💡