Multi-AZ EKS Cluster Setup with Service for Pod Communication Verification

As a DevOps Engineer, I thrive in the cloud and command a vast arsenal of tools and technologies: ☁️ AWS and Azure Cloud: Where the sky is the limit, I ensure applications soar. 🔨 DevOps Toolbelt: Git, GitHub, GitLab – I master them all for smooth development workflows. 🧱 Infrastructure as Code: Terraform and Ansible sculpt infrastructure like a masterpiece. 🐳 Containerization: With Docker, I package applications for effortless deployment. 🚀 Orchestration: Kubernetes conducts my application symphonies. 🌐 Web Servers: Nginx and Apache, my trusted gatekeepers of the web.
Introduction
To create an Amazon EKS (Elastic Kubernetes Service) cluster in a Multi-AZ (Availability Zone) configuration and ensure that pods can communicate with each other across different AZs, you need to follow a detailed step-by-step process. This involves setting up an EKS cluster across multiple AZs, deploying an example application, and verifying cross-pod communication. This setup will also demonstrate high availability, resilience, and redundancy across different AZs.
Step 1: Prerequisites
AWS Account: Ensure you have an AWS account with sufficient permissions to create and manage EKS resources.
AWS CLI: Install the AWS CLI and configure it with your AWS credentials.
aws configurekubectl: Install
kubectlto interact with the Kubernetes cluster.curl -LO "https://dl.k8s.io/release/$(curl -L -s https://dl.k8s.io/release/stable.txt)/bin/linux/amd64/kubectl" chmod +x kubectl sudo mv kubectl /usr/local/bin/eksctl: Install
eksctl, a command-line tool for managing EKS clusters.curl --silent --location "https://github.com/weaveworks/eksctl/releases/download/0.140.0/eksctl_$(uname -s)_$(uname -m).tar.gz" | tar xz -C /tmp sudo mv /tmp/eksctl /usr/local/bin
Step 2: Create an EKS Cluster Across Multiple Availability Zones
Create the EKS Cluster using
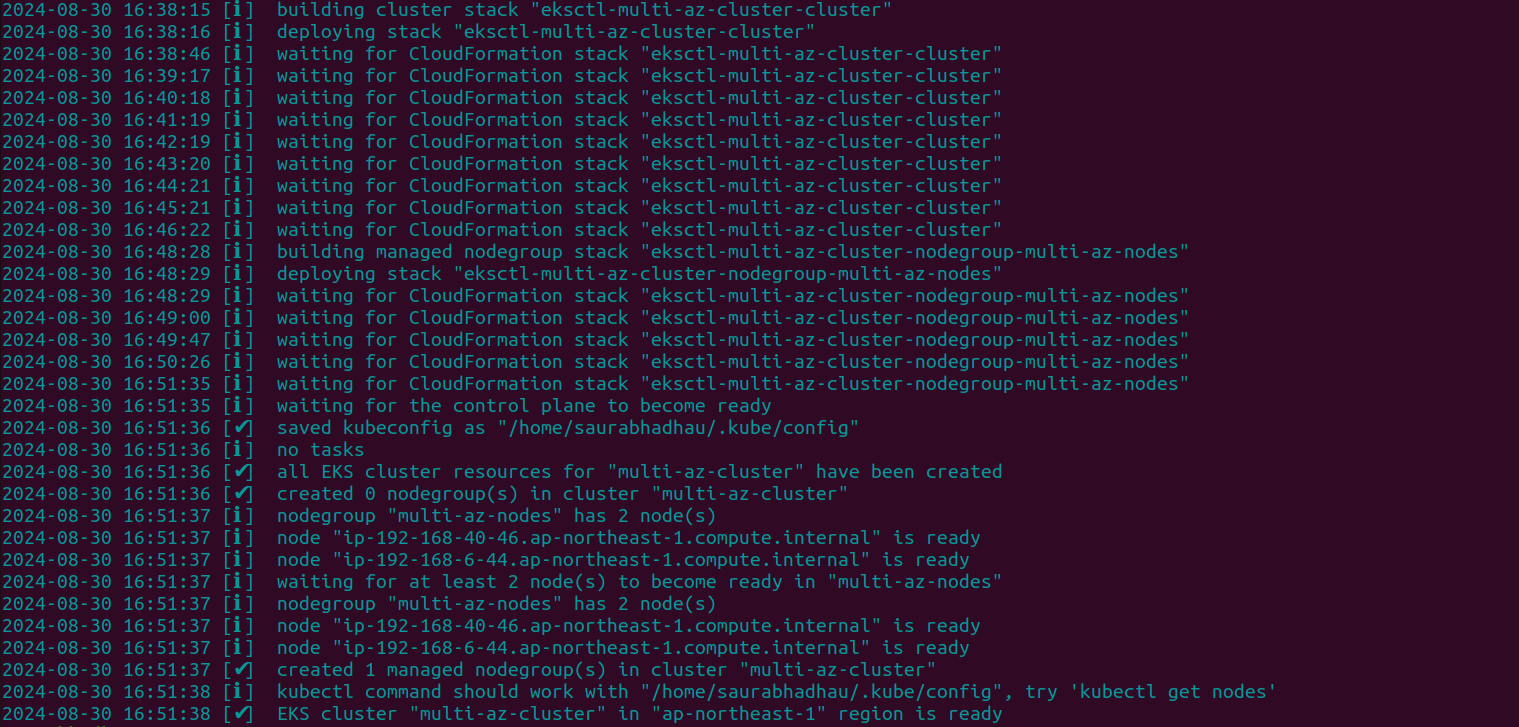
eksctl:The following command creates an EKS cluster named
multi-az-clusterwith nodes distributed across three different AZs:eksctl create cluster \ --name multi-az-cluster \ --region ap-northeast-1 \ --zones ap-northeast-1a,ap-northeast-1d \ --nodegroup-name multi-az-nodes \ --node-type t2.micro \ --nodes 2 \ --nodes-min 2 \ --nodes-max 4--region ap-northeast-1: Specifies the AWS region.--zones ap-northeast-1a,ap-northeast-1d: Specifies the AZs for the cluster.--nodegroup-name multi-az-nodes: Names the node group.--nodes 2: Specifies the initial number of nodes.--nodes-min 2and--nodes-max 4: Configures the autoscaling range for the node group.After applying the above command you can see the output like this:
Verify the Cluster Creation:
Once the cluster is created, verify its status:
eksctl get cluster --name multi-az-clusterCheck the nodes:
kubectl get nodes --show-labelsThis command will display the nodes along with their AZ labels.
Step 3: Deploy an Example Application and Service
To test pod-to-pod communication across AZs, we'll deploy a simple nginx application with multiple replicas and create a Kubernetes Service to expose these pods.
Create a Deployment YAML File:
Create a file named
nginx-deployment.yaml:apiVersion: apps/v1 kind: Deployment metadata: name: nginx-deployment spec: replicas: 4 selector: matchLabels: app: nginx template: metadata: labels: app: nginx spec: affinity: podAntiAffinity: requiredDuringSchedulingIgnoredDuringExecution: - labelSelector: matchExpressions: - key: app operator: In values: - nginx topologyKey: "topology.kubernetes.io/zone" containers: - name: nginx image: nginx:latest ports: - containerPort: 80- Affinity Rules: The
podAntiAffinityrule ensures that the nginx pods are spread across different AZs for high availability.
- Affinity Rules: The
Create a Service YAML File:
Create a file named
nginx-service.yamlto expose thenginxpods.apiVersion: v1 kind: Service metadata: name: nginx-service spec: selector: app: nginx ports: - protocol: TCP port: 80 targetPort: 80 type: ClusterIPkind: Service: Defines the Kubernetes Service.selector: Matches thenginxpods created by the deployment.type: ClusterIP: Creates an internal service within the cluster that other pods can access.
Deploy the Application and Service:
Apply the deployment and service to the cluster:
 kubectl apply -f nginx-deployment.yaml
 kubectl apply -f nginx-service.yaml
Verify the Deployment and Service:
Check that the pods are running and spread across different AZs:
kubectl get pods -o wideCheck the service status and get its Cluster IP:
kubectl get svcYou should see an entry for
nginx-servicewith its internalClusterIP.

Step 4: Verify Pod Communication Across Availability Zones
To ensure that pods can communicate across AZs, we'll use a busybox pod to test communication with the nginx pods.
Deploy a
busyboxPod:Run the following command to create a
busyboxpod:kubectl run busybox --image=busybox --restart=Never -- sleep 3600This pod will run for 3600 seconds (1 hour) to allow you time to perform the communication test.

Test Communication with Nginx Pods via the Service:
Use the
kubectl execcommand to log into thebusyboxpod and test communication with thenginxservice:kubectl exec -it busybox -- /bin/shInside the
busyboxpod, test communication with thenginxservice by its service name, there are multiple ways to do it:wget --spider --timeout=1 nginx-service wget --spider --timeout=1 http://<nginx-pod-ip> wget --spider --timeout=1 http://nginx-serviceIf the service is reachable, you should get a response indicating that the service is available.

Step 5: Verify High Availability of the EKS Cluster
To ensure the EKS cluster is highly available across multiple AZs:
Check Node Availability:
Verify that your nodes are running in different AZs:
kubectl get nodes --show-labelsLook for the
topology.kubernetes.io/zonelabel to confirm nodes are distributed across AZs.Simulate an AZ Failure:
Simulate a failure by manually terminating an instance in one AZ through the AWS Management Console.
Monitor Pod Rescheduling:
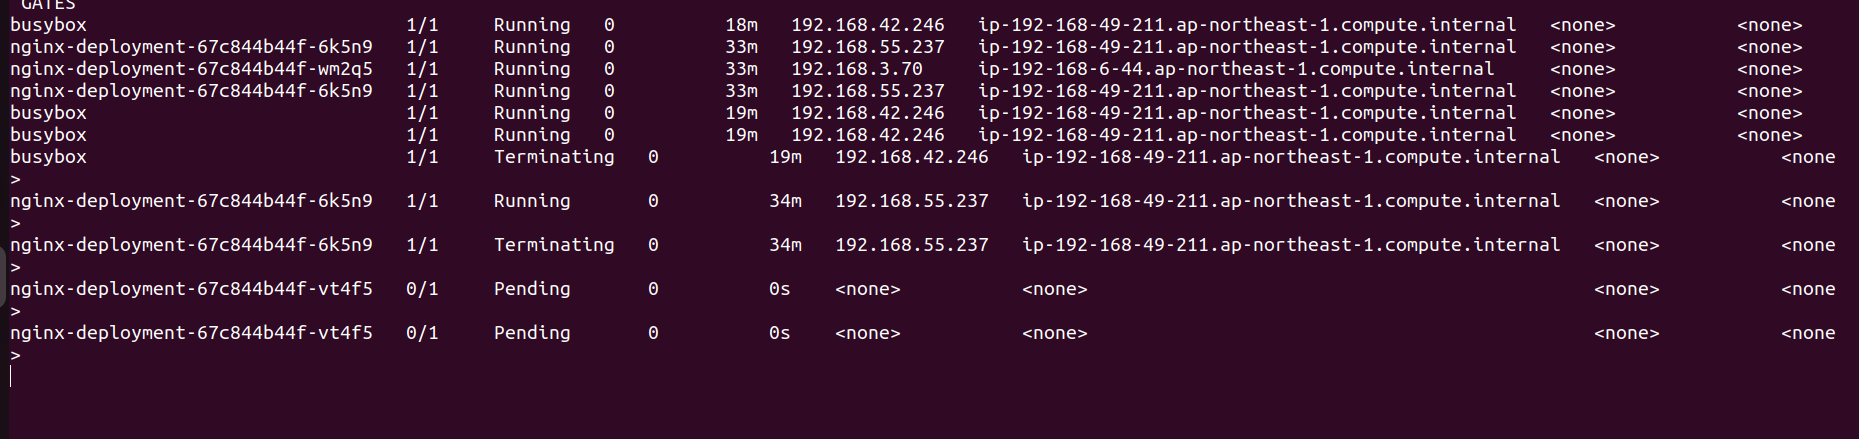
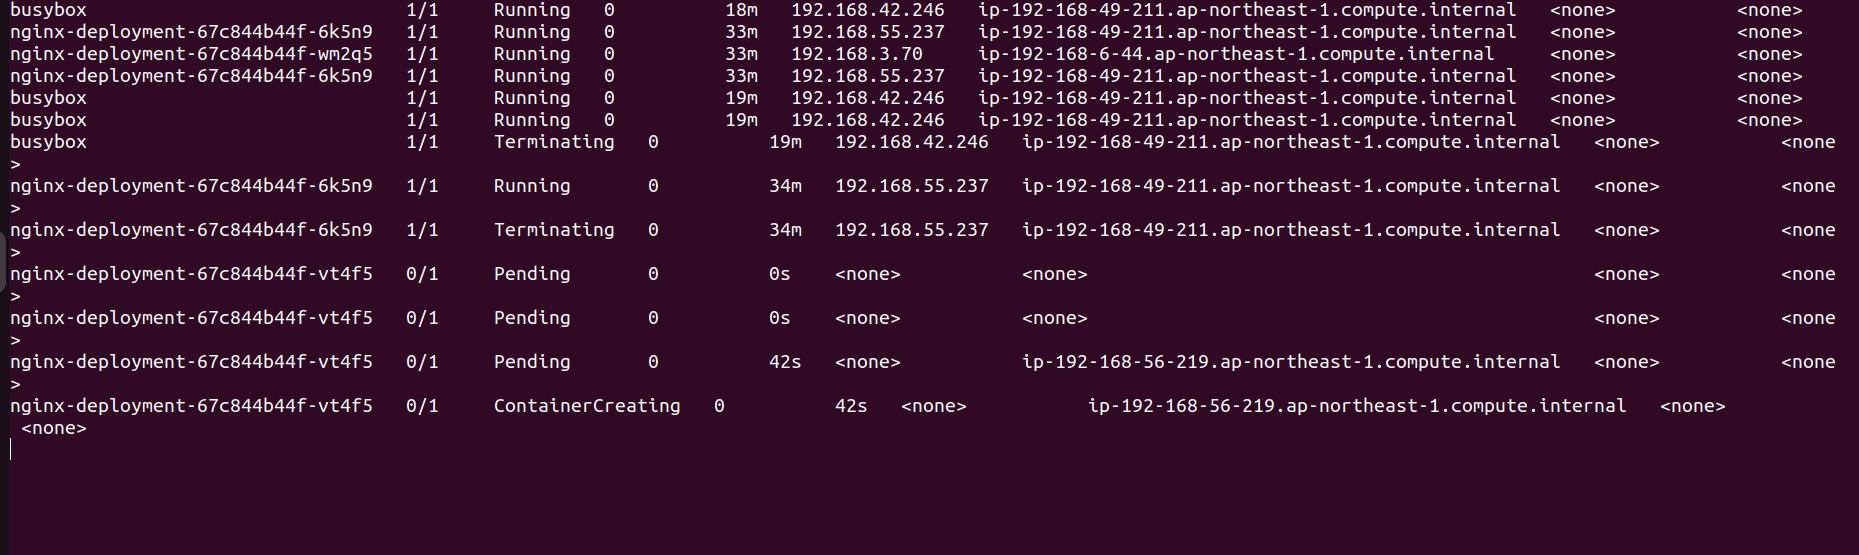
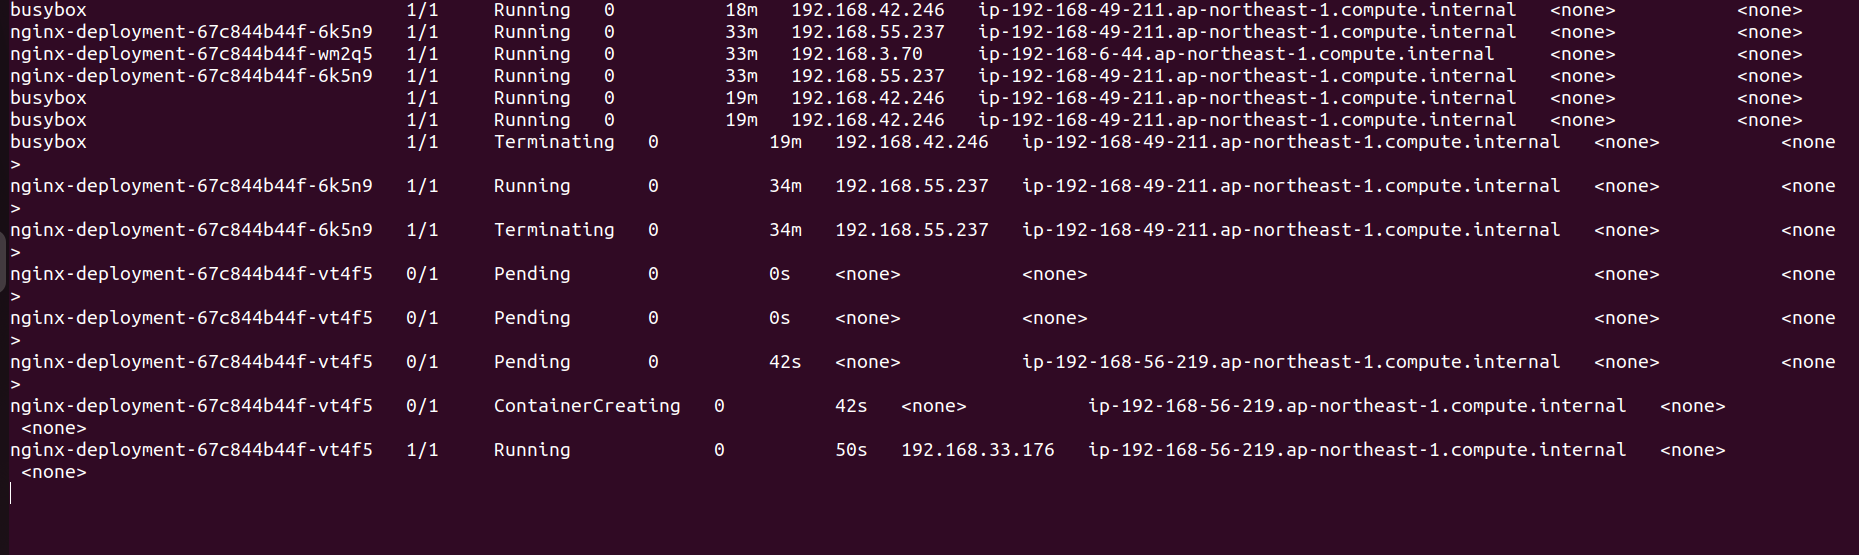
Use the following command to monitor the pods:
kubectl get pods -o wide --watchKubernetes should reschedule the pods from the terminated instance to the remaining healthy nodes in other AZs. You can see the activity in the below images:

Check Application Availability:
Confirm that the application is still available by accessing the Nginx service through a
LoadBalancerorNodePort.If you've set up a service with a
LoadBalancertype, you can get the external IP and check access:kubectl get svcAccess the external IP in your browser to verify that the application is still accessible.

Step 6: Clean Up Resources
Once you have verified the communication and high availability, clean up the resources to avoid unnecessary charges:
eksctl delete cluster --name multi-az-cluster
Conclusion
By following these updated steps, you've created an EKS cluster across multiple Availability Zones, deployed an example application, and verified that pods can communicate across AZs using a Kubernetes Service, ensuring high availability and resilience. This setup helps maintain service continuity even when failures occur in one AZ.