Unlocking the Magic: Setting Up Ingress on Minikube with NGINX Ingress Controller 🚀

As a DevOps Engineer, I thrive in the cloud and command a vast arsenal of tools and technologies: ☁️ AWS and Azure Cloud: Where the sky is the limit, I ensure applications soar. 🔨 DevOps Toolbelt: Git, GitHub, GitLab – I master them all for smooth development workflows. 🧱 Infrastructure as Code: Terraform and Ansible sculpt infrastructure like a masterpiece. 🐳 Containerization: With Docker, I package applications for effortless deployment. 🚀 Orchestration: Kubernetes conducts my application symphonies. 🌐 Web Servers: Nginx and Apache, my trusted gatekeepers of the web.
In the realm of Kubernetes, Ingress is the gateway to granting external access to services within a cluster. But every good gatekeeper needs a controller, and that’s where the NGINX Ingress Controller comes into play. This article walks you through the process of setting up Ingress, using NGINX as your trusty gatekeeper, to elegantly route requests to different services, depending on the HTTP URI. So, fasten your seatbelts and embark on this journey to master Ingress on Minikube! 🌐

Before We Dive In 🌊
First things first, we assume you’re aboard the Minikube ship, cruising on a local Kubernetes cluster. If not, make sure to anchor your ship with Minikube. And, of course, ensure your trusty companion kubectl is configured to communicate with your cluster. If you’re not already on this voyage, you can create a Kubernetes cluster using Minikube or other Kubernetes playgrounds. 🏝️
Also, make sure your Kubernetes server is version 1.19 or later. You can check this by running:
kubectl version
Setting Sail: Create a Minikube Cluster ⚓️
If you haven’t already set up your cluster locally, let’s make it happen by running:
minikube start

Your cluster is now born and ready for action. 🚢
Raise the Drawbridge: Enable the Ingress Controller 🏰
Now, let’s talk business. To enable the NGINX Ingress controller, execute the following command:
minikube addons enable ingress

Now, for the grand reveal, let’s check if the NGINX Ingress controller is up and running:
kubectl get pods -n ingress-nginx

It may take a minute or so, but when it’s ready, you’ll see pods standing at attention, ready to serve your Ingress. ⚔️
Prepare to Set Sail: Deploy a Hello, World App 🌍
Ahoy there! It’s time to embark on an adventure by deploying your first app. First, create a Deployment for your web service:
kubectl create deployment web - image=gcr.io/google-samples/hello-app:1.0
Then, expose the Deployment to the world:
kubectl expose deployment web - type=NodePort - port=8080
To ensure your web service is available on a node port, run:
kubectl get service web
You’ll receive information about your service, including the NodePort. ⛵️
Now, you can visit your Service via NodePort by running:
minikube service web - url
Time to put your Captain’s hat on and navigate to the provided URL. If you run “curl http://minikube-IP:NodePort”, you’ll see a cheerful “Hello, world!” message. You’re now navigating the Kubernetes waters with your trusty Minikube and NGINX Ingress Controller as your crew. ⚓️

Creating a Map: Create an Ingress 🗺️
Next on the list is creating a map, your Ingress, which will route traffic to your Service via a special domain, hello-world.info.
Here’s an example manifest defining your Ingress, create example-ingress.yaml:
apiVersion: networking.k8s.io/v1
kind: Ingress
metadata:
  name: example-ingress
  annotations:
    nginx.ingress.kubernetes.io/rewrite-target: /$1
spec:
  rules:
    - host: hello-world.info
      http:
        paths:
          - path: /
            pathType: Prefix
            backend:
              service:
                name: web
                port:
                  number: 8080
You can create the Ingress object by running:
kubectl apply -f https://k8s.io/examples/service/networking/example-ingress.yaml
Now, you’ll see your Ingress manifest has been created. 🌍
Before you can set sail, make sure your IP address is ready:
kubectl get ingress

After a couple of minutes, an IPv4 address will appear in the ADDRESS column. 🏴☠️
Testing the Waters: Testing Your Ingress 🌊
Finally, you can test your Ingress. Access the first version of your Hello World app using:
curl - resolve "hello-world.info:80:$(minikube ip)" -i http://hello-world.info
You should see a familiar “Hello, world!” message.
Also you can check your browser:

Now that you’ve successfully set up your first Ingress route and sailed the Kubernetes seas, let’s dive into more exciting adventures. We’ll show you how to explore multiple versions of your Hello World app using the same Ingress configuration. 🏞️
Prepare for the Voyage: Add Entries to Your Hosts File
Before you set sail to explore different versions of your Hello World app, let’s make your journey even smoother. You can add entries to your computer’s /etc/hosts file to map domain names to Minikube’s IP address. This will allow your web browser to easily access the Ingress routes. Here’s how:
Optionally, find the external IP address reported by Minikube using:
minikube ip
Once you have the IP address, add a line similar to the following to the bottom of your computer’s /etc/hosts file. Please note that you’ll need administrator access to edit this file:
minikubeip hello-world.info
Be sure to replace minikubeip with the IP address you obtained from Minikube. This step ensures that your web browser knows where to find the Ingress routes.
Create a Second Deployment: Welcome, Web2!
Our next adventure involves deploying another version of your Hello World app. Let’s create a new Deployment for web2 with version 2.0:
kubectl create deployment web2 - image=gcr.io/google-samples/hello-app:2.0
You’ll see confirmation that your web2 Deployment has been created. This is where the fun begins! 🎉
Now, expose your newly created web2 Deployment:
kubectl expose deployment web2 - port=8080 - type=NodePort
You’ll receive confirmation that your web2 service has been exposed, and you’re all set to explore the next version of the Hello World app. 🚀
Edit the Existing Ingress: Chart Your Course to Web2
The existing Ingress has served you well, but now it’s time to extend its capabilities. Edit the “example-ingress.yaml” manifest and add the following lines at the end
apiVersion: networking.k8s.io/v1
kind: Ingress
metadata:
  name: example-ingress
  annotations:
    nginx.ingress.kubernetes.io/rewrite-target: /$1
spec:
  rules:
    - host: hello-world.info
      http:
        paths:
          - path: /
            pathType: Prefix
            backend:
              service:
                name: web
                port:
                  number: 8080
          - path: /v2
            pathType: Prefix
            backend:
              service:
                name: web2
                port:
                  number: 8080
With these lines, you’re telling Ingress to route traffic to /v2 to your new web2 service. Once you’ve made the changes, apply them:
kubectl apply -f example-ingress.yaml
You’ll receive confirmation that your Ingress has been configured, and you’re ready for the next leg of your journey. 🌐
Test Your Ingress: The Grand Finale
It’s time to put your newfound Ingress configuration to the test. Access the first version of the Hello World app using:
curl - resolve "hello-world.info:80:$(minikube ip)" -i http://hello-world.info

You’ll be greeted by the familiar “Hello, world!” message, proudly displaying “Version: 1.0.0” and the hostname of your web service.
But wait, there’s more! You can also explore the second version of the Hello World app:
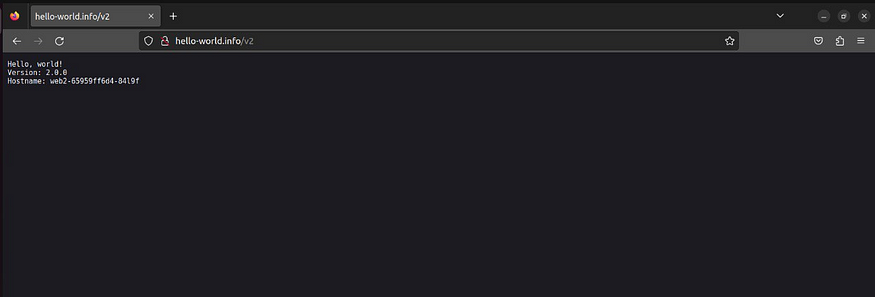
curl - resolve "hello-world.info:80:$(minikube ip)" -i http://hello-world.info/v2

This time, you’ll be welcomed by a cheerful “Hello, world!” message from the second version, proudly declaring “Version: 2.0.0” and displaying the hostname of your web2 service. 🎈
And remember, if you completed the optional step to update your /etc/hosts file, you can also visit hello-world.info and hello-world.info/v2 from your web browser, making your exploration even more delightful. 🌟
With your Ingress configuration set up, you’re now the captain of your Kubernetes ship, charting courses to different versions of your Hello World app with ease. Your Kubernetes adventure has just become a treasure trove of possibilities, and you’re sailing towards exciting horizons. 🌅